Moto X Rooting Method is here with proper root files. These are the steps for rooting the Motorola Moto X (2013)
using the TWRP recovery on a Windows computer.
Requirements:
Your smartphone’s battery should be at least 20-30% charged in order to perform the rooting process.
Motorola Moto X rooting method:
Unlock the bootloader on your Motorola device by following the step-by-step instructions.
After successfully unlocking the bootloader on the Motorola Moto X, you must install custom recovery (i.e TWRP or CWM recovery). To do so, connect your device to the computer first, then proceed with the procedures below.
Download the most recent version of SuperSU and place it in the root of the Phone SD memory.
On your computer, download and install the Minimal ADB and fastboot tools.
TWRP recovery (v2.6.3.1 tested functional) to be downloaded to your computer and renamed recovery.img.
Now, navigate to the Minimal ADB and Fastboot folder (C: Program Files (x86)Minimal ADB and Fastboot).
Twrp Restoration Minimal Fastboot has been relocated.
Now, from the Minimal ADB and Fastboot folder, run MAF32.exe or py cmd.exe. Launch the Maf32 Command Minimal Fastboot.
Give the following command: adb devices.
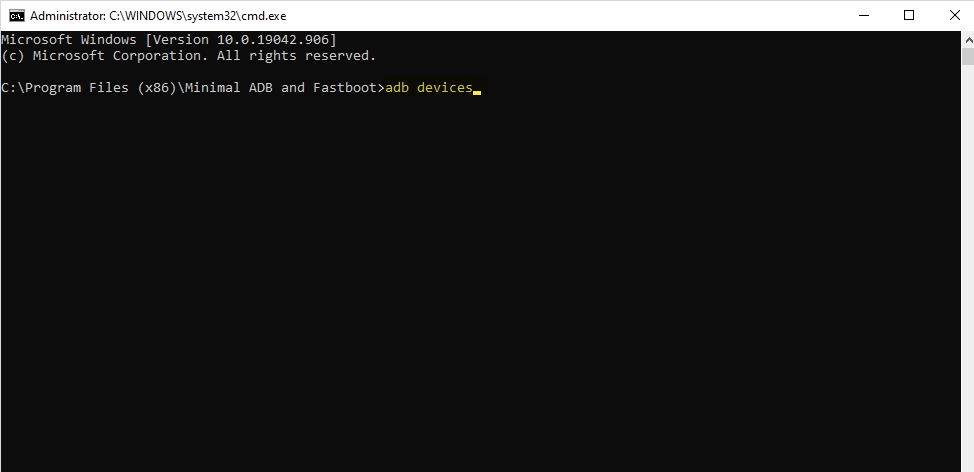
The above command displays a list of the computer’s associated devices.
Now, give the following command: adb reboot bootloader
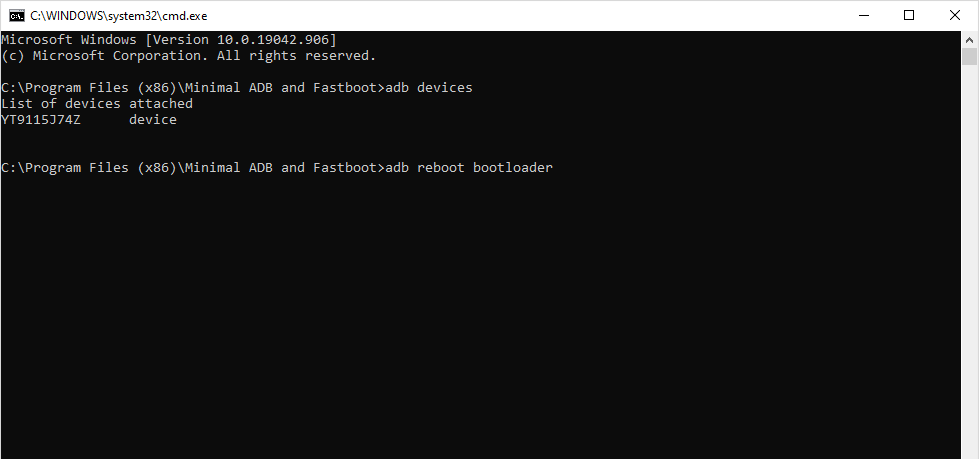
The command above will assist you in entering adb mode.
Now give the following command: fastboot flash recovery recovery.img
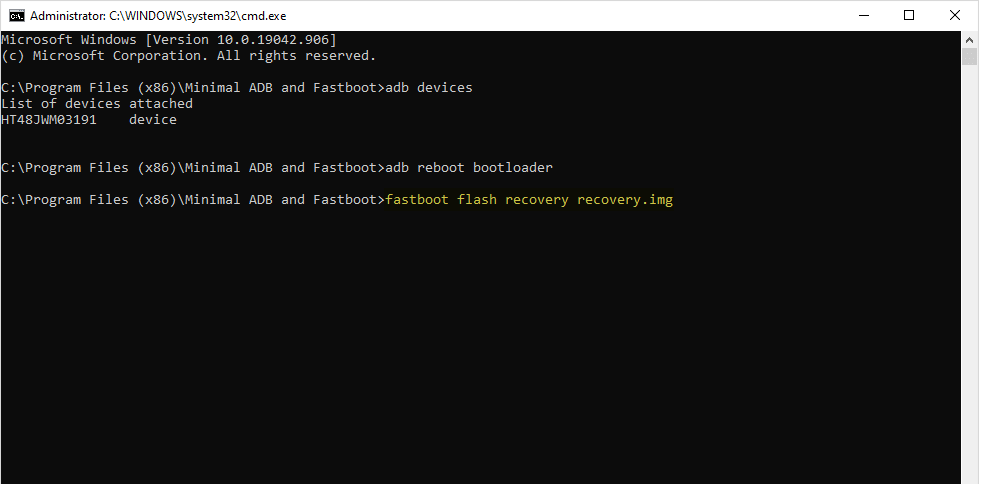
TWRP recovery will now be installed on your phone, and you will notice some activity on the Device screen.
You must now boot into the ADB mode. To enter adb mode, press and hold the Volume Down and Power keys for 4-5 seconds,
then release the Power key but continue to hold the Volume Down key until ADB mode appears on the screen.
After you’ve entered ADB mode, choose Recovery (use volume down for scrolling and Volume Up to select).
Once in TWRP recovery mode, tap on the Install button and choose the SuperSU package
that you moved to the Phone SD in Step #3. Install Supersu Twrp.
Reboot your device from the TWRP recovery mode. Twrp Installation Was a Success
After restarting your device, you should see the SuperSU icon in the Menu.
This means you’ve successfully rooted your Motorola Moto X. (2013). Supersu is installed on the Stock-5.0.
Optional:
You can also use the Root Checker Application to check the root status of your device.


